¶ Case of packages that are linked to a PCM
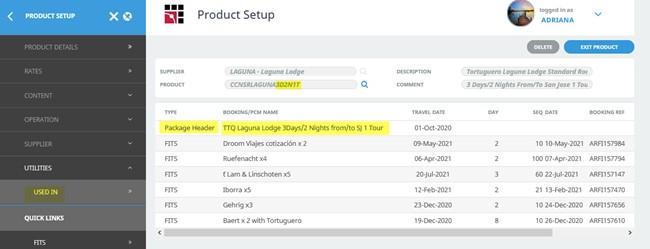
¶ Step 1: Find out the name of the PCM the package is linked to
This can be checked in Tourplan under Product Setup/Utilities/Used in
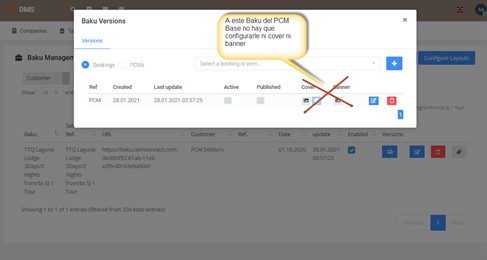
¶ Step 2: Go to the DMS and create a Baku for that PCM
Go to DMS/Content/Baku list, create a Baku for that PCM, and configure what you want to display: either just the package name or also the PCM services with the options:
- Show package header
- Show package services

Important: This Base PCM Baku must not be configured with either Cover or Banner.
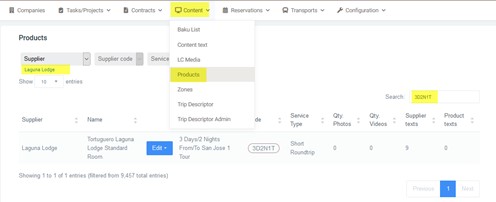
¶ Step 3: Configure content
Go to DMS/Content/Products
- Configure content that will appear in the Hotels area
Open Edit to add the package content

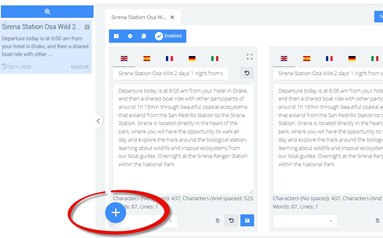
Click the “+” symbol to create the description text that will appear in the Hotels area
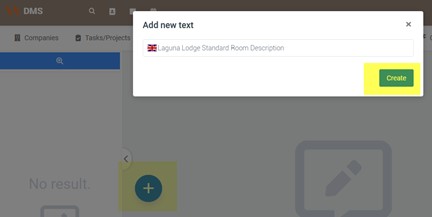
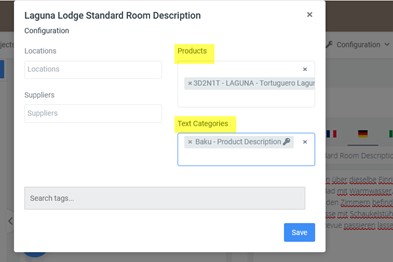
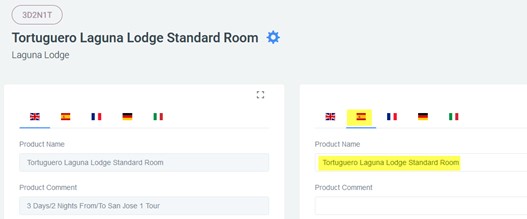
The text name must always be in English
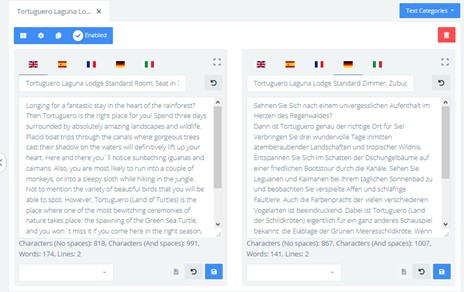
In the note configuration, it must have the linked product and Text category = Baku Product Description (default with the key icon)
This content will appear in the Baku under the Hotels area, and only this text will show—unlike hotels, where both a hotel description and a room description appear. Since this is an exception (a package with a PCM configured to display only the Package Header), only one description will appear in this area.

¶ Step 4: Configure the map
You can see more details in Section III of this document. In this example, I copied the map from another package.
Simply go to the Baku overview, click the edit box, and it takes you to that area.
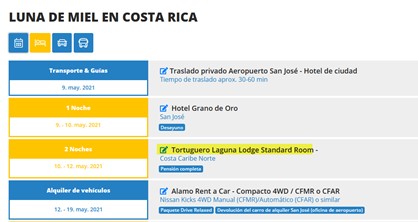
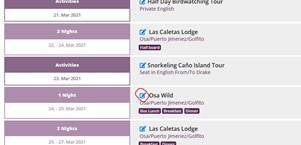
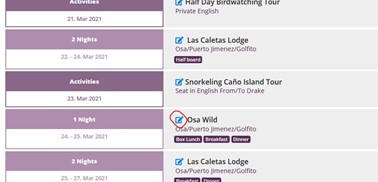
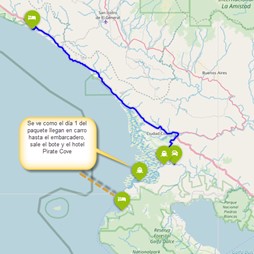
And this is how it looks in a Baku (a booking that includes that package):
¶ Case of packages that are NOT linked to a PCM, only the package itself
¶ Step 1: Add the content that should appear in the Hotels area
-
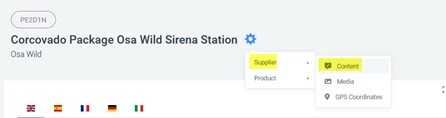
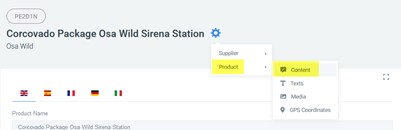
Example Osa Wild – go to the Baku overview, click the edit box
-
In the settings gear, go to Supplier/Content
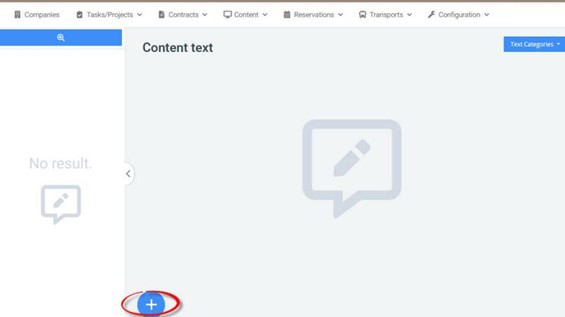
-
Click “+” if there is no description
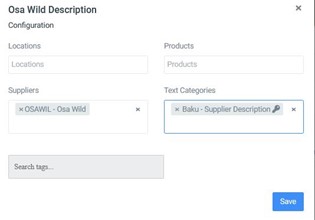
-
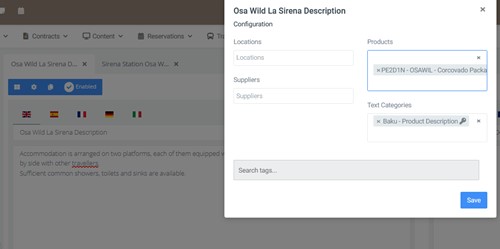
Add the content you want to display in the Hotels area under this supplier, Osa Wild
With configuration: Supplier and Text category = Baku Supplier description
¶ Step 2: Add a Room Description
-
Go back to the edit box
-
Go to Product/Content
-
If the room description text is missing (like in this case, where there’s only an itinerary text), click “+”
-
Add the description you want to appear for the room with configuration: Product and Text category = Baku Product Description
¶ Configure the map
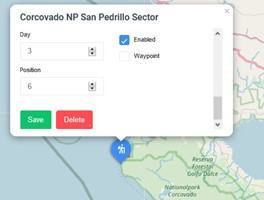
¶ Case of hotels that are not accessible by land
- Add a coordinate at the last road-accessible point for the day guests enter the hotel.
Example: at the dock where the boat to the hotel departs.
a) Day field must be 1
b) Position field set to 0
c) Enabled checkbox active
d) Waypoint checkbox active
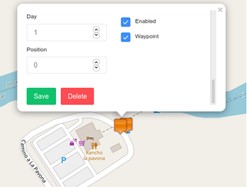
- Add a coordinate at the last road-accessible point for the day guests leave the hotel.
Example: at the dock where the boat departs.
a) Day field must be the day they leave the hotel
b) Position field set to 2
c) Enabled checkbox active
d) Waypoint checkbox active
The Baku Map is then generated automatically without the need to adjust routes:
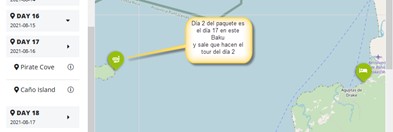
¶ Case of Packages that offer tours on different days
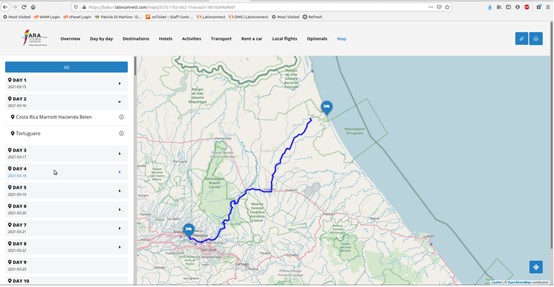
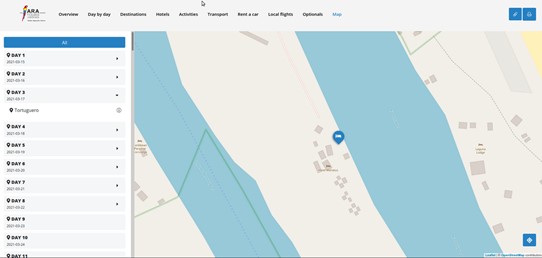
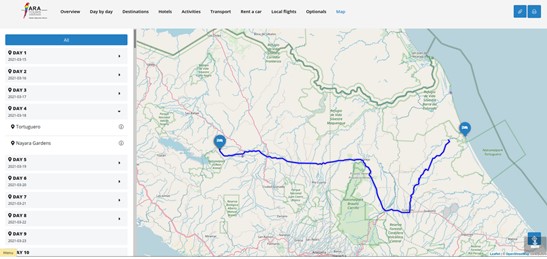
Example: Packages in Latinconnect operated by the same hotel, offering several tours on different days. To have those tours appear on the correct days, you must configure the package map in the DMS.
In Latinconnect, all icons are shown on the same day, but in Baku they should appear detailed day by day.
Example: https://ara.latinconnect.com/content/products/gps.php?prod=13375
Supplier = PIRCOV
Code = 4D3NSC
-
Transfer to the dock
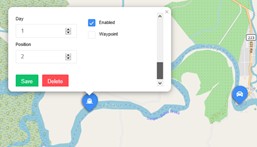
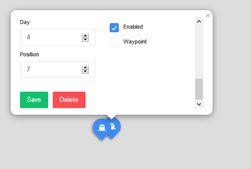
a) Day field = 1 (since this happens on Day 1 of the package)
b) Position field = 1 (first service)
c) Enabled checkbox active
d) Waypoint checkbox active

-
Boat transfer to the hotel
a) Day field = 1
b) Position field = 2 (second service)
c) Enabled checkbox active
d) Waypoint checkbox inactive, since no land route
e) Select the boat icon
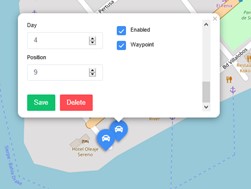
¶ Hotel
a) Day field left blank, since the hotel must appear every day
b) Position field = sequence order
c) Enabled checkbox active
d) Waypoint checkbox active only if there’s a land route to the hotel; otherwise, leave inactive (as in this case)
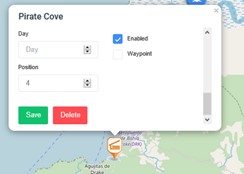
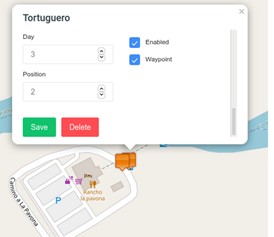
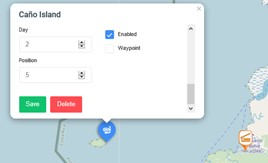
¶ Tours
a) Day field = day the tour takes place (e.g., Day 2 of the package)
b) Position field = sequence order
c) Enabled checkbox active
d) Waypoint checkbox active only if there’s a land route; otherwise inactive
Another tour happens on Day 3, so Day field = 3.
Thus, in Baku this tour will only appear on Day 3 of the package.
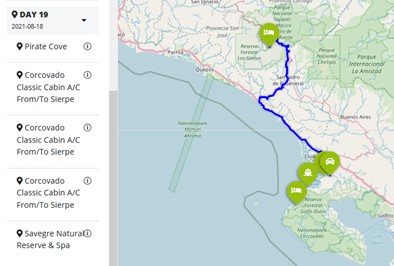
¶ Hotel departure transfers
Add a boat transfer on Day 4, continuing the sequence.
How it looks in the DMS:
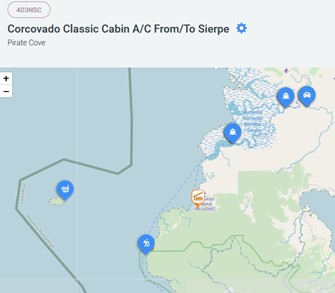
How it looks in Baku:
-
Day 1
-
Day 2
-
Day 3
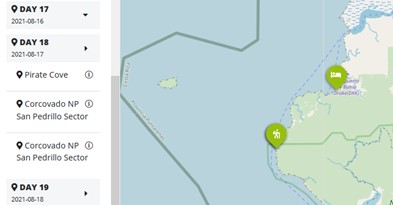
-
Day 4 (departure day)
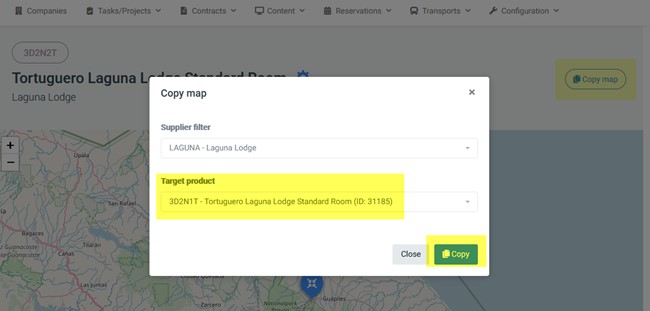
¶ How to copy maps?
This is a very useful feature. If you know of a similar package that already has a configured map, you can copy that map to the package you need.
Find the package with the map, click Copy map, and in the Target product field, enter the ID of the package you want to copy the map to.
¶ Where to find the ID of a package?
Open any page of the package that needs the map. In the web address at the top, you will see the ID. This is the most reliable way to avoid mistakes.
